I've really been trying to get better at just using what I have in the fridge and pantry to make dinner instead of spending a lot of money on groceries. While I do have a certain amount of money budgeted for the grocery store, and could just run out quickly to get a few things, I prefer to save that money for my big, once-a-month shopping trip. Therefore, it's imperative that I just use what I have to make dinner some nights. While I do plan out my meals for the entire month, life sometimes gets in the way and I can't make it to the store when I wanted and that kind of leaves me stranded every once in a while. Luckily, I'm getting better at thinking on my feet and whipping something up like my mom is able to do. Man, she's good at that. My sister and I still joke that she can use a toothpick, a cotton ball, and a button to make a prom dress. She's just as good when it comes to gettin' something on the stove quick, and it always turns out delicious. Someday I'll be just as good!
Shepherd's Pie with Cheddar Mashed Potatoes
Source: Me
Serves: 4-6
Ingredients:
3-4 large Russet potatoes, peeled and roughly chopped
2 T cream cheese or sour cream
1 egg yolk
1/2 cup chicken broth, heavy cream, or milk
3 T butter
1 cup shredded cheddar cheese
1 tsp dried parsley
1 lb ground beef
2 medium carrots, diced
1 small onion, chopped
2 T butter
2 T flour
1 cup beef broth
2 tsp Worcestershire sauce
1 can peas, drained
1 can corn, drained
Directions:
Boil potatoes in a large pot until fork tender, about 12-15 minutes. Take one potato chunk and add it to a bowl containing the egg yolk; mix together to temper the egg (makes sure that the egg doesn't scramble when you mix it into the hot potatoes); mix in one more potato and then transfer this egg mixture to the rest of the potatoes. Add the cream cheese (or sour cream), the chicken broth (or cream or milk), the 3 tablespoons of butter, cheddar cheese, and dried parsley. Use a hand mixer to whip the potatoes until they are creamy and contain no chunks.
While the potatoes are boiling, brown the beef for 3-4 minutes. Add in the carrots and onion and season with salt and pepper. Cook together for 7-10 minutes to take some of the crunch out of the carrots.
In a small pot, melt 2 tablespoons of butter and 2 tablespoons of flour together. Whisk in the beef broth and the Worcestershire sauce. Thicken one minute, stirring constantly with the whisk. Add to the meat mixture and stir in the peas and corn. Cook together for 5-7 minutes. Transfer to a 9x13 glass baking dish. Top with the potatoes and spread evenly over the meat mixture. Turn broiler on high and place dish under the broiler, about 6 inches away from the heat source. Broil for 6-8 minutes, or until potatoes are golden brown. Serve with a simple green salad!
Showing posts with label beef. Show all posts
Wednesday, November 17, 2010
Wednesday, July 28, 2010
Beef and Bean Burritos
I recently wandered over to the Pioneer Woman and found a couple of great "Sixteen Minute" recipes. During the summer months I don't particularly enjoy cooking indoors, but I hate to ask Mario to grill something every single night! I whipped this up (in a bit more than 16 minutes) and we both really enjoyed it--even though Mario's first choice isn't Mexican food! I cut the recipe in half since I wasn't feeding 2 growing boys and it was perfect for the two of us plus a lunch for me the next day! :)
Beef and Bean Burritos (that should take 16 minutes)
Yields: 4 servings
Source: ThePioneerWoman
Ingredients:
1 pound ground beef
1/2 yellow onion
1 small can Mexican Tomato Sauce (I think it's like 4.5 oz and the can is yellow)
salt and pepper to taste
oregano and garlic powder to taste
1 can (14.5 oz) refried beans
grated Mexican cheese
a package of burrito flour tortillas (whatever size you'd like)
your favorite toppings: cilantro, sour cream, tomatoes, salsa, guacamole, black olives, onions, green chiles, etc.
Directions:
Brown the beef and onion in a skillet; season with salt and pepper. Pour in the sauce, sprinkle in the garlic powder and oregano and simmer over medium-low heat. Heat refried beans in a saucepan and add cheese and still until its melted; keep on low heat. Heat the tortillas in the microwave for 30 seconds to 1 minute (do 2 at a time). Fill each tortilla with some beans and beef; fold the ends then roll it on up. Place the filled burritos on a plate, top with some cheese, and microwave for 1 minute or until the cheese is melted. Top with whatever you'd like! Serve with some Mexican rice!
Friday, May 21, 2010
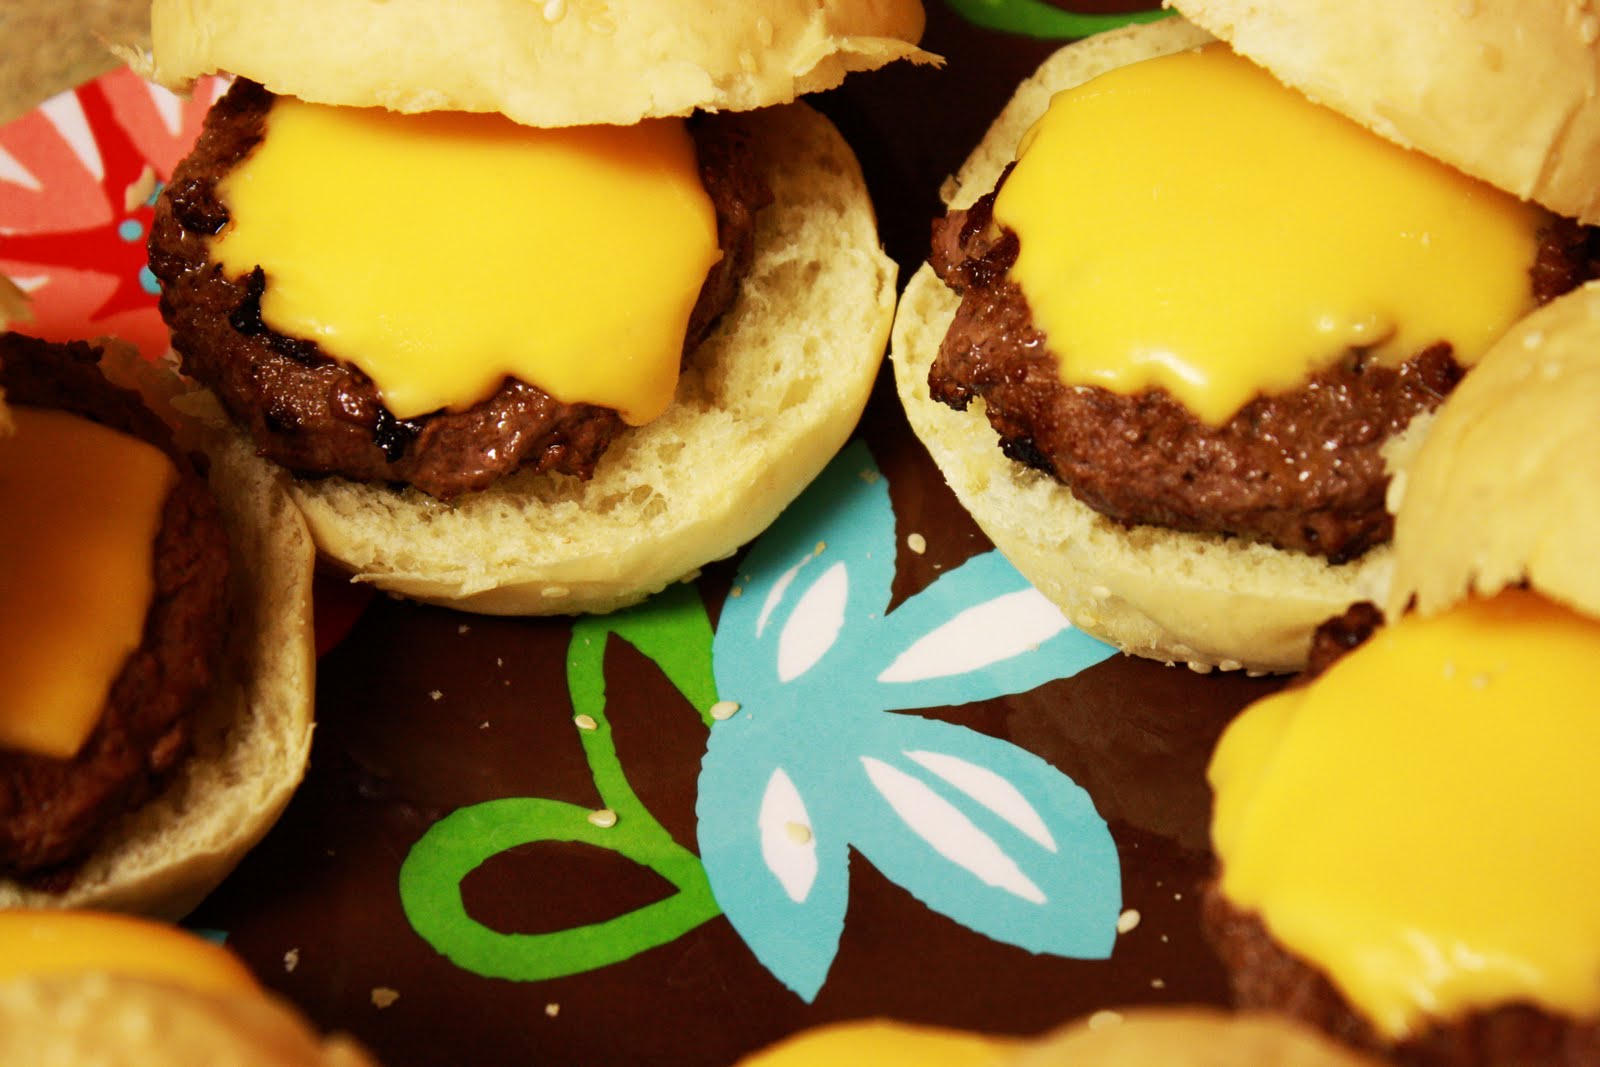
Mini Sliders
As the school year comes to a close, I find myself reflecting on my performance as a teacher during the year; if I had to give myself a report card, what grade would I receive? I guess I'd say a B, which is annoying because I really prefer A's. But, I know I have room to grow and there are always opportunities to become a better teacher. As a student, I'd probably give myself an A which is nice because I worked my butt off to get the grades I did this semester. What grade would I give myself as a blogger? Definitely a D...+...maybe a C-...no, definitely a D+. I haven't been faithful to the cause and I've allowed myself to go weeks on end without updating. It's not like I don't cook! I guess it's the accumulation of everything piled on top of me and the immense pressure I put on myself to be darn near perfect at everything I do. I blame my dad, really. We're perfectionists who stress about stressing too much. It's a vicious cycle and I'm aware of it!
These mini sliders were a bit [cue drum: bah-dump-sh] of celebratory dinner. I finished evening classes this week after what felt like the world's longest semester. I had about zero ounces of energy in me, but I knew I wanted to spend some time in the kitchen after a few consecutive nights of finals. I had picked these up at Fresh & Easy a little while ago and knew that after finals they'd make a fun meal.
I seasoned the patties with onion powder, powdered beef bouillon (that's not brown sugar on the patties; it's the bouillon), and salt and pepper. Then, I melted the butter on my flat frying pan and put the seasoned side down to cook first. While the first side was cooking, I seasoned the side facing up. The burgers cooked for about 8 minutes on the first side and another 6 minutes on the other (but I like mine well done).
When they were done, I put them on a plate and placed 2 quarter pieces of American cheese on each and tented the burgers with foil to melt the cheese. We enjoyed our burgers with the traditional ketchup, mustard, and mayo, but the topping choices are totally endless!
Happy End-of-the-School-Year!
Mini Sliders
Source: Me
mini burger patties (you can also form these yourself from a pound of hamburger; I bought a total of 12 patties which fed us for days)
mini burger buns
American cheese (or Cheddar, Swiss, Monterey Jack, Colby Jack, JalapeƱo Jack, Bleu, etc.)
onion powder
powdered beef bouillon
salt
pepper
a couple tablespoons of butter
Season burgers. Melt 1 tablespoon of butter on a hot frying pan. Put seasoned side of burgers down on melted butter; season the top side. Fry on each side until desired doneness. Top with cheese and tent with tin foil to melt the cheese. Put on the buns and dress with whatever toppings you'd like!
Friday, March 26, 2010
Cheeseburger Biscuit Bake
One late weekend night I was really mad at myself for not having planned dinner ahead of time! I was so busy grading papers and doing homework and before I knew it, it was time for dinner. I frantically searched through my fridge and pantry and a recent Valentine's Day gift from my mom (Pillsbury cookbook) and struck gold! I adapted the following recipe according to the availability of a few ingredients. I was really nervous about this dish because of the newness of it. I actually stood waiting for Computer Man's reaction. Success! He actually loved it and, despite being stuffed, went back for seconds. This meal came in at just about $10--maybe $11. I recommended it to a friend who has three children and she was ecstatic at the taste and affordability of this dish! Enjoy! Cheeseburger Biscuit Bake Source: Adapted from Pillsbury AnnualRecipes 2010 Yields: 6 servings
1 lb ground beef
1/4 yellow onion, chopped
2 dill pickles, chopped (next time I might even do 3 because I like pickles a lot)
1/4 cup water
1/2 cup ketchup
1 T yellow mustard (you can just do a big squeeze into the pan, don't measure this out--it takes too long)
a sprinkling of salt and pepper
2 cups shredded cheddar cheese
1 can (8 biscuits) flaky layers biscuits
1 egg, beaten
Preheat oven to 365. Brown the onions and ground beef together in a pan until the beef is fully cooked. Add in the water, ketchup, mustard, pickles, salt and pepper. Stir together and cook for about 5 minutes. Transfer the beef mixture to an ungreased glass baking dish (2 quart, or 11x7). Sprinkle cheese on top evenly. Separate the 8 biscuits from each other and then separate each biscuit in half by tearing apart at the middle layer. Arrange the biscuits on the cheese; use all the biscuits. If you have too many biscuits, just overlap a few, but make sure the cheese is fully covered; you can tear biscuits in half if you need to. Beat the egg and brush on top of the biscuits--this will give it a golden brown topping. Bake for about 30 minutes uncovered until the biscuits are a deep golden brown and fully cooked. You could also add in a can of corn or mixed veggies when you add in the ketchup and other ingredients; just increase the water amount by 1/4 cup then. I served mine with a bag of salad I got from Fresh and Easy for 98 cents!

1 lb ground beef
1/4 yellow onion, chopped
2 dill pickles, chopped (next time I might even do 3 because I like pickles a lot)
1/4 cup water
1/2 cup ketchup
1 T yellow mustard (you can just do a big squeeze into the pan, don't measure this out--it takes too long)
a sprinkling of salt and pepper
2 cups shredded cheddar cheese
1 can (8 biscuits) flaky layers biscuits
1 egg, beaten
Preheat oven to 365. Brown the onions and ground beef together in a pan until the beef is fully cooked. Add in the water, ketchup, mustard, pickles, salt and pepper. Stir together and cook for about 5 minutes. Transfer the beef mixture to an ungreased glass baking dish (2 quart, or 11x7). Sprinkle cheese on top evenly. Separate the 8 biscuits from each other and then separate each biscuit in half by tearing apart at the middle layer. Arrange the biscuits on the cheese; use all the biscuits. If you have too many biscuits, just overlap a few, but make sure the cheese is fully covered; you can tear biscuits in half if you need to. Beat the egg and brush on top of the biscuits--this will give it a golden brown topping. Bake for about 30 minutes uncovered until the biscuits are a deep golden brown and fully cooked. You could also add in a can of corn or mixed veggies when you add in the ketchup and other ingredients; just increase the water amount by 1/4 cup then. I served mine with a bag of salad I got from Fresh and Easy for 98 cents!
Friday, March 12, 2010
Good Ol' Sloppy Joes
I've heard them called BBQs, Taverns, and Sloppy Joes; I've even been slightly offended at having them called Manwiches. But, above all, I call them delicious. I love the simplicity of a Sloppy Joe sandwich. I used to love sitting down to a quick dinner with the family before a band or choir concert because my mom would effortlessly "just throw things together" in pan and call it dinner. We'd have fun things like chili cheese hot dogs, macaroni and cheese, or Sloppy Joes. On a semi-unrelated note, my mom has a funny way of cackling-laughing through a lot of things, but then again, I don't sugarcoat too much. I just kinda ask things straight up. So, when I asked her for the secret to making the perfect Sloppy Joe, she cackle-laughed through the following recipe. I realized how ridiculous it was to ask for a secret recipe like this when it was so, so easy! This makes a great weeknight dinner, and I hope you enjoy it!
Good Ol' Sloppy Joes
Source: Me and Mom
1 lb hamburger
1/2 cup ketchup
1/2 cup brown sugar
2 T mustard
2 T vinegar
salt and pepper
2 chopped dill pickles or dill pickle relish
4 burger buns
Brown hamburger in a skillet; season with salt and pepper. Once meat is totally browned, add the ketchup, brown sugar, mustard, and vinegar. Turn the heat up to medium-high and stir together the browned meat and other ingredients. Allow to simmer for 5-7 minutes. After that time, taste to decide if you want it sweeter (more brown sugar), tangier (more vinegar--not mustard), saltier (more, well, salt!), or if it's just perfect. Turn the heat down to low. Meanwhile, chop the pickles and slice the buns. Spoon the Sloppy Joe meat onto the buns and top with the chopped pickle. Serve with tater tots, fries, chips, or your favorite pasta or potato salad! Enjoy!
Good Ol' Sloppy Joes
Source: Me and Mom
1 lb hamburger
1/2 cup ketchup
1/2 cup brown sugar
2 T mustard
2 T vinegar
salt and pepper
2 chopped dill pickles or dill pickle relish
4 burger buns
Brown hamburger in a skillet; season with salt and pepper. Once meat is totally browned, add the ketchup, brown sugar, mustard, and vinegar. Turn the heat up to medium-high and stir together the browned meat and other ingredients. Allow to simmer for 5-7 minutes. After that time, taste to decide if you want it sweeter (more brown sugar), tangier (more vinegar--not mustard), saltier (more, well, salt!), or if it's just perfect. Turn the heat down to low. Meanwhile, chop the pickles and slice the buns. Spoon the Sloppy Joe meat onto the buns and top with the chopped pickle. Serve with tater tots, fries, chips, or your favorite pasta or potato salad! Enjoy!
Thursday, January 7, 2010
Tacos de Carne Asada
I live in Southern California where the Mexican food is both A) in abundance, and B) DELICIOUS. Growing up, we frequented the local Mexican restaurants on our family nights out. The question, "Italian? American? Chinese? Mexican?" never arose in my house; it was only "Which Mexican restaurant are we going to this time?" Our family would scarf down those baskets of chips and salsa! We usually always ordered the same thing: Dad will have a chimichanga, Mom will have a loaded quesadilla, I'll have a shredded beef taco and cheese enchilada, and Kim (my younger sister) will have taquitos. It never failed. Well, my Lebanese husband grew up exactly opposite...all Lebanese food, all the time, so when the rare occasion arises that he's willing to have Mexican food, I go for it! These tacos de carne asada are a regular staple at our friends' parties. Mario grills the meat to perfection while I heat the tortillas to the perfect temperature. Ultimately, you may not have access to a Mexican market so I've provided an alternate version of the meat below. Enjoy!
Tacos de Carne Asada
Serves: 4
1 1/2 lbs. carne asada from your local Mexican market, 1 1/2 lbs. flank steak seasoned with salt, pepper, garlic powder, and carne asada seasoning found in plastic baggies in the grocery store
2 limes, each sliced into 8 wedges
1/2 - 1 bunch of cilantro, chopped
1/2 - 1 yellow onion, diced
your favorite guacamole
sour cream
salsa
8 oz. shredded cheese
8 small, soft, corn tortillas
your favorite Mexican rice and beans on the side
Heat grill on medium-low. Grill steak until desired doneness. Meanwhile, dice onions, chop cilantro, dip a few chips in your favorite salsa and guacamole, cut the limes, open a cold beer, and shred the cheese (or open the bag!). Take the meat off the grill and allow to rest for a few minutes. To heat the tortillas, you can do it one of two ways: 1) over the flame on your gas stove or the hot grill plates on your grill, toast the tortillas one at a time for just a few seconds on either side until you see a few toasty charred spots, or 2) put a small frying pan over medium high heat and warm the tortillas one at a time, flipping every few seconds. When the meat has rested, slice it into strips or cut it into squares. Load your tortilla up with a few pieces of meat, squirt some lime on the carne, top it with some cilantro, onion, sour cream, guacamole, and cheese. You can, of course, alter this to suit your own tastes. Serve with rice and beans and you're set to have a fiesta! Ole!

No cheese for me--this time at least!

I don't drink often, but I do love beer and tacos!

Yum!


My camera's not the best for motion shots, but you get the point!
Tacos de Carne Asada
Serves: 4
1 1/2 lbs. carne asada from your local Mexican market, 1 1/2 lbs. flank steak seasoned with salt, pepper, garlic powder, and carne asada seasoning found in plastic baggies in the grocery store
2 limes, each sliced into 8 wedges
1/2 - 1 bunch of cilantro, chopped
1/2 - 1 yellow onion, diced
your favorite guacamole
sour cream
salsa
8 oz. shredded cheese
8 small, soft, corn tortillas
your favorite Mexican rice and beans on the side
Heat grill on medium-low. Grill steak until desired doneness. Meanwhile, dice onions, chop cilantro, dip a few chips in your favorite salsa and guacamole, cut the limes, open a cold beer, and shred the cheese (or open the bag!). Take the meat off the grill and allow to rest for a few minutes. To heat the tortillas, you can do it one of two ways: 1) over the flame on your gas stove or the hot grill plates on your grill, toast the tortillas one at a time for just a few seconds on either side until you see a few toasty charred spots, or 2) put a small frying pan over medium high heat and warm the tortillas one at a time, flipping every few seconds. When the meat has rested, slice it into strips or cut it into squares. Load your tortilla up with a few pieces of meat, squirt some lime on the carne, top it with some cilantro, onion, sour cream, guacamole, and cheese. You can, of course, alter this to suit your own tastes. Serve with rice and beans and you're set to have a fiesta! Ole!
No cheese for me--this time at least!
I don't drink often, but I do love beer and tacos!
Yum!
My camera's not the best for motion shots, but you get the point!
Subscribe to:
Posts (Atom)