Saturday, January 30, 2010

Peanut Butter Cookies

I am not totally in love with baking; I find that cooking allows for more freedom and spontaneity whereas baking requires you follow a set recipe. I love the freedom that comes with throwing everything AND the kitchen sink into the pot and seeing your husband's new favorite dish come alive. I think all wives would agree that satisfying our husband is a number one priority, next to supporting him in His walk with the Lord. I just get so much joy out of seeing my husband's face light up when he takes that first bite: his mouth is full and he's trying to say, "Honey, it's wonderful!" but it turns out more like, "Mnhmy, fis funmferful!" I don't care that he just spit some out on my new placemat, he loves my food. I wish every new experience were that idyllic. Let me give you a taste of our conversation this afternoon:

Me-"Honey, I'm making peanut butter cookies. Do you like those?"
Him-"I don't like ANYTHING peanut butter. Well, except peanut butter and jelly."
Me-"Oh well, more for me."
...fast forward to the first cookie off the pan...
Me-"Oh my goodness, these are delicious. Here, try it and quit talking about your computer."
Him-"It's just peanut butter in cookie form."
Me-"Uhhh, yeah, that's why they're called 'Peanut Butter Cookies'."
Him-"Well, slap some jelly on it and I'm good to go."
Me (in my head)-"Ugh. Why doesn't this man love sweets? Annoying."
Me (aloud)-"Okay, no problem, dear. Whatever you'd like!"

So, alas, I have 40 peanut butter cookies and one mouth...I guess that's a pretty good ratio. We're heading over to Cooking in Cucamonga's house tomorrow, so hopefully she'll help me eat them! I don't think her husband (affectionately referred to as 'the husband' on her blog) likes sweets too much either, so the odds are in our favor! And, as you can see in the pictures, I had to try various backgrounds for their shot, and they look cute in whatever they're wearing whether it's zebra, blue, or orange! Enjoy!

Peanut Butter Cookies that are Delicious Even if Your Husband Doesn't Like Sweets
Source: Annie's Eats
Yield: about 3 dozen cookies

Ingredients:
3 cups all-purpose flour
1 cup sugar
1½ tsp. baking soda
1 tsp. baking powder
½ tsp. salt
¼ cup vegetable shortening
4 tbsp. unsalted butter, at room temperature
1 cup creamy peanut butter
1 cup honey
2 large eggs
Sugar, for rolling the cookies

Directions:
Preheat oven to 350˚ F. In a medium mixing bowl, combine the flour, sugar, baking soda, baking powder and salt; whisk together and set aside. In the bowl of a stand mixer fitted with the paddle attachment, cream together the shortening, butter, peanut butter and honey. Mix in the eggs one at a time, beating well after each addition. With the mixer on low speed, add the dry ingredients to the peanut butter mixture and beat just until incorporated.

Roll the dough into 1½-inch balls, and roll each dough ball in sugar. Place the dough balls on an ungreased baking sheet, a couple inches apart. You can either leave them in little balls of heaven, or you can press them down about halfway using a fork so you get that cool looking criss-cross; I personally liked leaving them as balls of joy. Bake for 10-12 minutes, or until slightly puffed and golden (I had to go almost 14 minutes). Remove from the oven and let cool on the baking sheet for 5-10 minutes before transferring to a wire cooling rack to cool completely. Repeat with the remaining dough. Store in an airtight container.


Monday, January 25, 2010

Green Chile Chicken Enchiladas

Friends come in stages; many of the friends I had as a little girl are not the same friends that I have now as young adult which will likely not be the friends I have when I'm 60. But, there are few friends I KNOW will be around forever. One of these such friends is Kalene; we've been best friends since junior high. Another is Summer. We didn't meet until college, but I know we'll be the best of friends forever. Enter, Green Chile Chicken Enchiladas! I went over to Summer's mom's house one night, and getting together with Summer and her mom means lots of good food, lots of fun, and lots of laughs. Her mom, Judy, is a wonderfully creative stamper/scrapbooker and an amazing chef. Summer also loves to cook. She and I developed our love for cooking from our moms, so we immediately had a connection. When Judy made this for dinner I immediately demanded the recipe. It is so rich and creamy and not one of the flavors overpowers another. When Summer and I get together we usually end up complimenting each other's talents perfectly: she always takes care of the dessert while I prepare the savory dishes. Enjoy this recipe with your favorite Mexican rice (I either use a box or go to my local Mexican restaurant...although I should learn to make it soon!).

Green Chile Chicken Enchiladas
Source: Judy
Serves: 6
2 chicken breasts, cooked and shredded (or 1 can of canned chicken)
1 16 oz. container of sour cream
3 c. shredded Mexican style cheese (a combo of Monterey Jack and cheddar works)
1 4 oz. can diced green chiles, like Ortega chiles, do not drain
2 cans cream of mushroom soup
12 corn tortillas
8 green onions, diced
1/2 tsp. salt

Preheat oven to 350. Combine the cream of mushroom soup, the sour cream, the chicken, the green chiles, and the salt in a large bowl. Mix well to blend flavors. In a 9x13 baking dish, spoon enough of the sour cream mixture to coat the bottom. Warm the tortillas in the microwave for 30 seconds, or until they're all warm enough to roll without breaking. Fill each tortilla with some cheese and green onions--leave some behind for topping; roll and place seam side down on the bottom of the baking dish. Cover the filled tortillas with the remaining sour cream mixture and top with the rest of the cheese and green onions. Bake for 25-35 minutes until cheese is melted and the dish is bubbling. Enjoy with rice!

Sunday, January 24, 2010

Kafta and Potatoes

Marrying into a Lebanese family was a bit daunting at first. I felt the pressure in recreating Mom's old recipes. Well, I just haven't mustered up the courage to take it on yet, so my husband joyfully accepts the task of making the Lebanese fare in our home. Take it away, honey!

Kafta
1 pound ground beef
1 bunch curly (not Italian) parsley
1 yellow onion
salt and pepper

Allow beef to defrost completely. Tear the parsley leaves off and let them sit in a bowl of water overnight, or at least for a few hours. Dry the parsley and put it into a food processor. Peel and roughly chop the onion; put it in the food processor with the parsley. Pulse until finely minced. Put the onion/parsley and the beef in a large bowl. Season with salt and pepper (a few shakes of each). Take your rings off and wash your hands! Gently combine the beef and parsley/onion until just mixed--don't overmix. Shape into little logs (about 9), or patties (about 6), or 4 long logs and put on a metal skewer. Grill until well done.

Garlic and Olive Oil Potatoes
6 medium Russet potatoes, washed and chopped
1/2 c olive oil (basically, enough to drizzle over the potatoes twice)
1/2 stick butter, cubed
garlic salt
pepper

Get that grill fired up on low! Line a 9x13 METAL baking pan with foil; make sure the foil covers the sides, too. Drop the potatoes in the pan. Drizzle the olive oil over the potatoes. Sprinkle with garlic salt and pepper. Using clean hands, toss the potatoes to cover well with the olive oil. Dot the cubes of butter throughout the pan. Cover the pan with more foil. Set on the grill and allow to cook for an hour. Thirty minutes into cooking is when you should put the kafta (above) on the grill.


Friday, January 22, 2010

Tequila Lime Grilled Chicken with Cilantro Rice

I hate when people say "OMG," but "OMG"! This dinner was amazing! After last night's kitchen debacle, I was ready to go out to dinner tonight. But, since we're planning on purchasing a new couch soon, we decided to just use the marinating chicken and follow through with my intended plan. I am SO glad I followed through instead of giving up! Isn't that what teachers try to instill in their students?! How could I live with myself if I didn't follow my own advice? I got this recipe from Annie's Eats and, of course, adapted it to suit our tastes. My husband doesn't like spicy so I had to make sure it wasn't spicy in the least. I wanted to use more tequila but stuck with the recipe because I was scared to use too much, but now I regret that. I have changed the recipe to fit the way we prepared it, but you can find the original here. I used the original recipe, but will use the one below next time. Enjoy! Here's a printable recipe link.

Tequila Lime Grilled Chicken
2 boneless, skinless chicken breasts
1 tsp. chili powder or cayenne pepper
1/2 cup tequila
1/2 cup freshly squeezed lime juice
1/4 cup freshly squeeze orange juice
2 tsp. minced garlic
1 tsp. salt
1/2 tsp. black pepper

Mix the chili powder, tequila, lime juice, orange juice, garlic, salt, and pepper in a large zip lock baggie. Seal and shake to mix well. Add the chicken breasts and toss to coat. Put the bag in a deep bowl and make sure the liquid covers the chicken when it rests in the bowl. Put it in the refrigerator and allow to marinate overnight. When you're ready to grill it, put it on a grill on medium heat and grill until thoroughly cooked and has beautiful black grill lines on it.

Cilantro Rice
1 tsp. minced garlic
1 shallot, minced
1 handful of chopped cilantro
1/2 small jalapeno, seeded and minced
2 T. salted butter + 1 T. to add in when the rice is cooked
1/2 tsp. garlic powder
salt and pepper to taste
the juice of 1-2 limes, depending how juicy your limes are
2 cups uncooked rice
4 cups water

While your chicken is grilling, melt 2 T. of salted butter in the bottom of a pot on medium-low heat. Add in the shallot and minced garlic. Move around the pan quickly and allow the shallot to become soft and translucent, but don't let the garlic burn. Add in the rice and mix well with the garlic, shallots and butter. Add in the water, and turn up the heat to high to get the water boiling. Once the rice has come to a boil, turn the heat to low and put the lid on. Allow to cook and absorb the water, about 20 minutes. Fold in the minced jalapeno, salt and pepper, the other 1 T. of butter, the juice of the limes, and the cilantro. Serve immediately with the chicken which should be done by now. We ended up squirting even more lime juice on it and the chicken while we were eating. Yum!


Thursday, January 21, 2010

Chicken with Broccoli in White Cheddar Sauce

Okay...I think the rain is getting to me...I had a TERRIBLE night in the kitchen! I guess it happens to the best of us--although I don't consider myself "one of the best." I had a gut feeling something was going to go wrong, but I stayed in the kitchen! I didn't have all the ingredients necessary and my butter kept burning the pan! Argh! Okay, I think I'm over it. Anyways, I love the idea of this, especially because it's from Annie's Eats. But, I just wasn't prepared. I think it had to do with a long day of work, tutoring after work, and trying to do two things at once in the kitchen. I'll put the recipe that I used below, but here's the link to Annie's dish. Good luck--I hope you have more success than I did!

Chicken with Broccoli in White Cheddar Sauce
1 chicken breast, grilled (I used the George Foreman)
8 oz. tube pasta
1 c whole milk
2 c. broccoli florets
6 oz. white cheddar cheese, shredded (I used Sharp Cheddar: Vermont White)
2 T. butter
1 1/2 T. flour
1-1 1/2 tsp. minced garlic
1/4 c. of the water the pasta was boiled in

Bring a pot of water to a boil. Boil the pasta according to the package directions. The last couple of minutes of boiling the pasta, add in the broccoli and let the water come back to a boil for a few minutes. Turn the water off, but don't drain it until the end.

For the cheese sauce, begin by melting 2 T. of butter in a skillet. Add in the minced garlic and move around the pan quickly. Add in the 1 1/2 T. of flour and move around the pan quickly. Don't let any of this burn because you have to start over and it stinks! Add in the milk and let it thicken and begin to bubble. Add in the cheese and stir using a figure eight motion. By this time the pasta/broccoli should be done. Go ahead and drain it, reserving just 1/4 c. of the pasta water. Add that into the cheese sauce to thin it out a bit. Season the cheese sauce with salt and pepper to taste. Return the pasta/broccoli to the pot and pour the cheese sauce on top. Toss to coat and serve immediately.


Wednesday, January 20, 2010

Chicken Pesto Artichoke Calzone

Wow! What a simple and delicious dinner! I love these rainy nights when I'm forced to stay inside! As a teacher, I find myself exhausted and ready for bed the minute I walk in the door each afternoon. Today, though, I had the opportunity to observe a few of my fellow teachers and came home with lots of energy and a grocery bag full of the ingredients needed for this calzone. I am newly addicted visitor of Annie's Eats, and her recipes are so inspiring! I love that I have a wealth of recipes at my fingertips! Enjoy this recipe and check out her site for even more delicious ones!

Chicken Pesto Artichoke Calzone
1 pizza dough
basil pesto
1 cup shredded mozzarella cheese
2 chicken breasts, grilled
1/2 can of canned artichokes, drained and rinsed and coarsely chopped
1-2 tsp minced garlic
salt and pepper

Preheat oven to 500 degrees; put pizza stone in oven while it heats up and allow pizza stone to heat for at least 30 minutes. Salt and pepper both sides of chicken; grill until well done. Cut into chunks when it's done and set aside. Flour a piece of parchment paper and roll out pizza dough to the size of your pizza stone. Spread some pesto on the dough; for a pizza you'd leave some room around the edges, but for this you can go out as far as you'd like with the pesto. Also, I don't have an exact measurement on the pesto, but it should be a good enough layer to cover the dough. Put on as much or as little as you'd like. Put 1/2 c. mozzarella cheese on just half of the dough. Chop the artichokes and garlic together. Layer on top of cheese. Add the grilled chicken, a bit more pesto and the rest of the cheese. Feel free to add more cheese! Fold the dough over so you create a half moon shape. Fold the edges over on each other to make sure the dough is sealed. Bake about 10 minutes, or until crust is golden brown with a few darker spots on top. Serve with ranch dipping sauce! Yummy!


Holiday (or Everyday!) Cheeseball

So many people have the preconceived notion that cheeseballs are lumps of over-processed junk--which they usually are--and are always left untouched at parties. This recipe, however, is always the first thing to be devoured at all my family parties. Pictures to come!

Cheeseball

2 (8 oz.) pkgs. cream cheese, at room temp.
8 green onions, sliced into small rings
4 oz. dried beef (Carl Buddig is best), chopped
4 tsp. Worcestershire sauce
1 cup shredded cheddar cheese

Chop beef and green onions. Mix the beef, green onions, Worcestershire, cream cheese, and 3/4 cup cheese. Turn out onto a piece of wax paper and form into a ball. Roll it in the remaining 1/4 cup cheese. Transfer to a plate, cover with plastic wrap and let chill in refrigerator for 2 hours. Bring out of fridge at least 20 minutes before serving to allow it to soften a bit. Ritz crackers, wheat thins, club crackers, or Triscuits are the best choice of crackers to serve with it.

Monday, January 18, 2010

Lemon and Clove Cookies

During Christmas vacation (the most wonderful 17 days in a teacher's school year), I had the chance to get together with my friend, Janet. She has totally inspired my cooking! I have always loved cooking, but when I started teaching I felt too tired to do much of it. But, in an effort to save money I have realized that it is important to get back in the kitchen and bless my husband with homemade food! This recipe was Janet's, and can be found on her blog here. Enjoy!

Lemon Clove Cookies
Source: Adapted from
McCormicks, and Janet!
Printable Recipe


Ingredients
2 cups flour
1/4 teaspoon ground cloves
1/8 teaspoon salt
3/4 cup butter (1 and a half sticks), softened
1 cup sugar
1 egg
1 teaspoon lemon extract
zest of one lemon

Icing
1 1/2 cups powdered sugar
2 tablespoons plus 2 teaspoons fresh lemon juice
1/4 teaspoon lemon extract
zest of one lemon

Directions
Mix flour, cloves and salt in medium bowl; set aside.

Beat butter and granulated sugar in large bowl with electric mixer on medium speed until light and fluffy. Add egg, lemon zest and lemon extract; beat until well blended. Gradually beat in flour mixture until well mixed.

Divide dough in half. Form each half into a log about 1 1/2 inches in diameter and 9 inches long. Wrap in wax paper. (I totally ignored these directions and made one large rectangle, so my cookies came out more oblong than round.)

Refrigerate 1 hour or until firm.

Preheat oven to 350°F.

Cut dough into 1/4-inch thick slices. Place on ungreased baking sheets.

Bake 12 to 15 minutes or until lightly browned. Cool on baking sheets 1 minute. Remove to wire racks; cool completely.

For the Lemon Glaze, mix powdered sugar, lemon juice, lemon zest, and lemon extract in small bowl until well blended. Drizzle over cooled cookies. Let stand until glaze is set.


Cheesy Potatoes 'n Ham

I guess I'm craving comfort food because all that I've made today has been my mom's recipes! I think it's sad that I have to live so far away from my family, but that's life! I got the following recipe when I was 10 years old from my neighbor. I went to their house for dinner one night and then immediately ran home with the recipe and gave it to my mom. She, of course, adapted it to suit our family's tastes, and since then this recipe has been at the top of my request list. I made it for my husband when we were newly married and it now tops his request list! I hope you enjoy it as much as I do!

Cheesy Potatoes (a.k.a Cornflake Hotdish)

1 (32 oz.) bag cubed hashbrowns--thawed 3o min. at least
1 can cream of chicken soup
8 oz. sour cream
8 oz. shredded sharp cheddar cheese
2 c. crushed cornflakes
1/2 stick melted butter
1/2 tsp. salt
1/2 tsp. pepper
6-7 slices cooked ham (lunch meat)

Mix potatoes, soup, sour cream, cheese, ham, salt, and pepper together in a large bowl. Pour into a greased 9x13 glass baking dish. In another bowl, melt butter in microwave. Toss the crushed cornflakes in the melted butter and sprinkle on top of hashbrowns mixture. Bake at 350 for an hour until bubbly and cornflakes are browned. Serve hot. Delicious as leftovers the next day!


Mom's Chocolate Chip Cookies

I miss my mom! She and my dad along with my sister and nephew live in South Dakota. In fact, the majority of my extended family lives there. Meanwhile, I'm stuck in sunny Southern California...wait...that's not such a bad thing! At any rate, I really wish I could spend rainy days baking and cooking with my mom. But, alas, I'm left to do it solo! I got a hankering for my mom's chocolate chip cookies which, by the way, NEVER turn out as good as hers do! I'm also a much better cook than baker, but I try! So, I spent the afternoon baking cookies and listening to the rain...avoiding lesson planning...

Here's Mom's Best Chocolate Chip Cookies recipe:

Ingredients:
1 c butter at room temp (2 sticks of unsalted butter)
3/4 c white sugar
3/4 c brown sugar (light or dark)
2 eggs at room temp
1 tsp real vanilla extract
2 1/4 c all-purpose flour
1 tsp baking soda
1/2 tsp salt
2 c (12 oz bag) semi-sweet chocolate chips

Directions:
Cream together butter and both sugars. Add eggs one at a time, then add vanilla. Sift together flour, baking soda, and salt. Add slowly to sugar mixture; keep the mixer going on low. Drop by spoonfuls (or use a mini ice cream scoop!) onto an ungreased cookie sheet. Bake at 350 for 8-10 minutes, or until golden brown and cooked through. Depending how much of the raw cookie dough you eat, you should end up with about 3 doz cookies.

Note on the pan choice: air bake pans are a bad choice for this recipe! Don't do it! Resist the urge! use a regular pan without any parchment paper or wax paper on it--just a plain old pan! When you take them out of the oven, let them sit on the pan for a few minutes and then transfer to a cooling rack.


Sunday, January 10, 2010

Shinning Stars!

A friend (Janet of Cooking in Cucamonga) and I got together recently to decorate some sugar cookies (luckily she had baked them the day before otherwise this would've been a much longer process!). We happen to teach together, but we have become friends as opposed to just co-workers. We feel like everyone deserves recognition as a shinning star, so this was our way of demonstrating this! Our school colors are purple and gold, but these pictures show blue and purple!! I guess my next purchase is a decent camera that actually does my food justice. Neither of us had ever used royal icing so it was a learning experience for both of us! We definitely learned a lot along the way, and ended up having a fun afternoon together--which is more valuable than any cookie! :-)

We used the following recipe for cookies and royal icing, courtesy of Annie's Eats (of course!).

Ella’s White Sugar Cookies
Ingredients:
1 cup butter
1 cup powdered sugar
1 egg, beaten
1 ½ t. almond extract
1 t. vanilla
1 t. salt
2 ½ c. sifted flour

Directions:
Cream butter. Add powdered sugar. Blend in egg, almond extract, vanilla, salt and flour. Chill dough until firm. Roll to ¼” thickness on well-floured surface. Cut with cookie cutters. Place on greased cookie sheets. Bake at 375° for 8-10 min. Cookies should not brown. Frost and decorate when cool. Yields about 40 cookies.

Royal Icing Recipe and Royal Icing Tutorial (thanks, Annie's Eats!)

Saturday, January 9, 2010

It'sa Pizza! Mama mia!

I bought a pizza stone about 2 years ago and never used it. Through the inspiration of Janet, a good friend and the writer of Cooking in Cucamonga, I realized it was time to break it out of the cupboard. So, that's exactly what I did. One of my favorite things to eat is pizza--I think there are many who would agree with me. It can contain just about any topping and I'll eat it...emphasis on the "just about." I really love pizzas that change it up a bit, though I tend to revert back to black olives and cheese on occasion. Normally, I get Combination because I love the flavors of the veggies and meat.

But, tonight it was a bit of change for both my husband and me (he loves Hawaiian or just plain cheese). I'm a new reader of Annie's Eats, and a pizza she made totally inspired this dish. One thing I love about cooking is that there's so much room for freedom; if you don't like one ingredient, usually you can substitute it for another. My pizza consisted of bacon, cilantro, red onion, grilled chicken (thanks, honey!), ranch, green onions, and Tapatia Ranch for dipping. I really wish I would've had buffalo sauce, so I've added that in the recipe below. Here's the recipe:


Chicken Bacon Ranch Pizza
Serves: 4
Source: inspired by Annie's Eats Chicken Ranch Pizza

Ingredients:
1 ball of pizza dough
1/4 to 1/2 cup ranch
6 slices of bacon, cooked
1 chicken breast, grilled
a few stalks of cilantro, chopped
1 green onion, diced
1/4 red onion, diced
2 cups shredded colby jack cheese
your favorite buffalo sauce for dipping

Directions:
Pre-heat the pizza stone in a 500-degree oven. Allow pizza stone to heat for at least 30 minutes. Meanwhile, grill the chicken, cook the bacon, dice the onions (red and green), and chop the cliantro. Set the green onions and cilantro aside, you'll add those as a toppping when the pizza comes out of the oven. Tear off a sheet of parchment paper or wax paper big enough to hold your pizza dough. Sprinkle it with corn meal, semolina flour, or regular white flour if you're in a pinch. Roll out the dough to about a 12-14 inch circle. Spread the ranch on the dough, leaving about a 1/4 inch rim around the edge. Sprinkle some cheese on it so there's a thin layer barely covering the ranch. Add the red onion. Once the bacon and chicken are done, but up into small chunks and sprinkle over the cheese. Sprinkle the rest of the cheese over the chicken and bake for about 12-15 minutes until the cheese bubbly and the crust is lightly browned. When the pizza is done, take it out of the oven and sprinkle the green onions and cilantro on top. Pour the buffalo sauce either in a small bowl for dipping or right over the pizza. Cut into slices and enjoy!

Variations:
Other good toppings to put on either before or after cooking would be fresh tomatoes, sun-dried tomatoes, pepperoncinis, or olives. The topping choices are endless. Another good variation on the chicken would be to grill it with the buffalo sauce already on it, or use barbeque sauce instead!

Thursday, January 7, 2010

Tacos de Carne Asada

I live in Southern California where the Mexican food is both A) in abundance, and B) DELICIOUS. Growing up, we frequented the local Mexican restaurants on our family nights out. The question, "Italian? American? Chinese? Mexican?" never arose in my house; it was only "Which Mexican restaurant are we going to this time?" Our family would scarf down those baskets of chips and salsa! We usually always ordered the same thing: Dad will have a chimichanga, Mom will have a loaded quesadilla, I'll have a shredded beef taco and cheese enchilada, and Kim (my younger sister) will have taquitos. It never failed. Well, my Lebanese husband grew up exactly opposite...all Lebanese food, all the time, so when the rare occasion arises that he's willing to have Mexican food, I go for it! These tacos de carne asada are a regular staple at our friends' parties. Mario grills the meat to perfection while I heat the tortillas to the perfect temperature. Ultimately, you may not have access to a Mexican market so I've provided an alternate version of the meat below. Enjoy!

Tacos de Carne Asada
Serves: 4

1 1/2 lbs. carne asada from your local Mexican market, 1 1/2 lbs. flank steak seasoned with salt, pepper, garlic powder, and carne asada seasoning found in plastic baggies in the grocery store
2 limes, each sliced into 8 wedges
1/2 - 1 bunch of cilantro, chopped
1/2 - 1 yellow onion, diced
your favorite guacamole
sour cream
salsa
8 oz. shredded cheese
8 small, soft, corn tortillas
your favorite Mexican rice and beans on the side

Heat grill on medium-low. Grill steak until desired doneness. Meanwhile, dice onions, chop cilantro, dip a few chips in your favorite salsa and guacamole, cut the limes, open a cold beer, and shred the cheese (or open the bag!). Take the meat off the grill and allow to rest for a few minutes. To heat the tortillas, you can do it one of two ways: 1) over the flame on your gas stove or the hot grill plates on your grill, toast the tortillas one at a time for just a few seconds on either side until you see a few toasty charred spots, or 2) put a small frying pan over medium high heat and warm the tortillas one at a time, flipping every few seconds. When the meat has rested, slice it into strips or cut it into squares. Load your tortilla up with a few pieces of meat, squirt some lime on the carne, top it with some cilantro, onion, sour cream, guacamole, and cheese. You can, of course, alter this to suit your own tastes. Serve with rice and beans and you're set to have a fiesta! Ole!


No cheese for me--this time at least!


I don't drink often, but I do love beer and tacos!


Yum!


My camera's not the best for motion shots, but you get the point!

Wednesday, January 6, 2010

Bazella u Riz

I met my husband on the internet when we were in high school. We talked online for four years until I was 18 and was allowed to meet him in person. We saw other people in high school; we were more like pen pals, but after meeting in person we knew we were meant to be together. My husband, Mario, was born in Beirut, Lebanon, and is the kind of guy who grew up with a mother who slaved all day in the kitchen to ensure a hot meal was ready for her family in the afternoon. She passed away last year, so not only do we all miss her greatly, we miss her cooking! There were a few prized recipes she took with her to heaven, but luckily we were able to squeeze a few secrets out of her.

My husband enjoys getting in the kitchen himself, and the grill is definitely his area of expertise. But, tonight, he got in to the kitchen to give me the night off (except that means I have to do dishes!). I don't know how to spell the Arabic name for this dish, so we just say "Peas and Rice." I think it's something like Bazella u Riz. No, I'm not going to find the Arabic characters for that--I have to work in the morning. I don't think the picture does this dish justice; it is my absolute favorite Lebanese dish. Mario surprised me one night when I came home from work with this dish. I was dead tired, sick as a dog with a migraine, and still had a full week of work ahead of me. I had no idea he had called his sister and asked for this recipe--I can't tell you how many nights we salivated over the thought of Peas and Rice. Okay, and I have to defend the plate that I used for the dish, too. You see, Mario's mom bought the ugliest Corelle possible back in the late 80s: mauve and country blue roses edge a sickening beige plate. BUT, we can't get rid of them because they belong to her...that would mean d-i-v-o-r-c-e and I love him too much! Nevertheless, the plates are really handy since they have a nice well and hold the perfect quantity of food. Please enjoy this dish as much as I do!


Bazella u Riz
1 lb. hamburger
4 small cans of tomato sauce
2 1/2 tomato sauce cans of water
1 yellow onion, finely chopped (I use the food processor)
2 cans of peas and carrots, drained and rinsed
1 can of peas, drained and rinsed
1 1/2 c. white rice (not instant)
3 c. water
a handful of fideos, or vermicelli
3 T. veg. oil
salt and pepper
pita bread for dipping (optional, but delicious and the traditional way of eating it)

In a large stock pot, saute the chopped onions in 2 T of oil, use another T. of oil if you feel like you need to. Once the onions are golden and transparent, add the hamburger, salt and pepper it, and brown it with the onions. The key here is to make sure you get the ground beef into very small pieces, big chunks of ground beef are not good in this dish. Once the hamburger is browned, add in all the peas and carrots and let them warm through. Then add in the tomato sauces and the cans of water. Cover and bring tomato sauce mixture to a bubble (on high!); stir regularly. Keep the sauce bubbling for at least 30 minutes to allow it to thicken. Then, take the lid off, sprinkle some more salt in, and reduce the heat to low and let simmer for another 20 or 30 minutes. You'll start the rice at this point and the two will be done perfectly on time. For the rice, begin by heating the remaining 1 T. of oil in a separate pot. Add the vermicelli and allow it to come to a golden brown. Add in the rice and water and bring the water to a boil; once it's boiling reduce heat to low, keep the rice covered, and let simmer for about 20 minutes, or until the liquid is absorbed. To serve, plate the rice first. Spoon some of the tomato meat mixture over the rice. Serve with pita bread which you can basically use as spoon!


Mmmmmmmmac n' Cheese n' Dogs!

I grew up with the kind of mother who made sure dinner was homemade and delicious every night and the kind of father who worked hard to make sure there was sufficient funds for food. My sister and I never worried about if there would be enough of the traditional comforts at home, and were grateful that we were occasionally afforded a few luxuries. As a middle school teacher and student myself, I don't have an abundance of time, but I do enjoy making a some favorite comfort foods when the opportunity arises. Enter, Pioneer Woman's Baked Mac and Cheese, the kind of dish that would please my parents: homemade, delicious, cost-effective, and comforting.

I was sifting through the recipes over at Annie's Eats when I stumbled across this fantastic recipe. Now, I love Pioneer Woman immensely, but I've never tried any of her recipes! There's a first time for everything, right?! So, with the husband in class, an empty house, and a grocery cart full of the necessary ingredients, I set off on this cheesy adventure. I loved making this dish; it was relatively simple but did require my full attention. For me, too, it was educational: I have NEVER tempered an egg--EVER! And this recipe required that successfully temper one! It also asked me to use whole milk and lots of it too boot...I hate whole milk...but it was delicious, though not the kind of dish I can make every night seeing as though my ever-expanding waistline cannot afford much more! Finally, it allowed me to make some adaptions to my own tastes, which I think is the mark of any good recipe. Here's the recipe below--with my own addition: 5 sliced hot dogs!

Pioneer Woman’s Baked Mac and Cheese with Hot Dogs!
Ingredients:

5 hot dogs, sliced
4 cups uncooked macaroni (I like small elbow macaroni, but curly pasta or bow ties would be fun!)
4 tbsp. butter--not margarine
1/4 cup all-purpose flour
2 1/2 cups whole milk
2 tsp. dry mustard
1 egg, beaten
1 lb. cheese, grated (I used all cheddar, but I’m sure a combination would be great too)
1/2 tsp. salt
1/4 tsp. garlic powder
1/4 tsp. onion powder
1/2-1 tsp. ground black pepper
Dashes of cayenne, paprika, and/or thyme (optional) – (I only used cayenne!)

Directions:
Preheat the oven to 350 degrees F. Slice hot dogs and boil them and the macaroni according to package directions until slightly firm. Drain and set aside.

In a large pot (perhaps the same pot in which you boiled the pasta so as to save time on dishes later?!), melt the butter over medium-low heat. Whisk in the flour and cook the mixture for five minutes, whisking constantly and being careful not to burn. Add the milk to the pot, stir in the dry mustard, and whisk until smooth. Cook the mixture for five minutes until very thick. Reduce the heat to low.

Add the beaten egg to a small bowl. Take 1/4 cup of the warm sauce and slowly pour it into the beaten egg, whisking constantly to avoid scrambling the egg. Whisk until smooth. Pour the tempered egg mixture back into the sauce, whisking constantly. Stir until smooth. Mix in the cheese, reserving a handful for topping, and stir until completely melted. Add in salt and other seasonings. Taste and adjust seasonings accordingly. Add the drained cooked macaroni to the pot and mix well.

Pour the mixture into a greased 9x13 baking dish, top with reserved cheese, and bake for 20-25 minutes or until golden and bubbly on top.

Source: adapted from Annie's Eats and The Pioneer Woman.

Mmmmm...shredded cheese...

Macaroni and hot dogs getting delicious and creamy!


Voila! A perfectly scrumdidlyumptious bowl of mac n' cheese n' dogs!

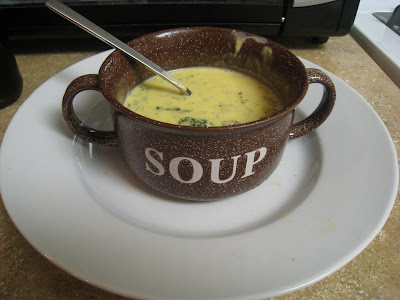
Broccoli Cheese Soup

It's rainy. It's cold. It's Christmas vacation. I'm in the mood for soup. Now, the husband is convinced soup is just not a big enough dinner, but when you have a rich and creamy chowder running down your throat while the rain simultaneously runs down the windowpane is this not sufficient? He still says, No. Okay, I'll budge.

So, tonight I put a delicious pot of Broccoli Cheese soup on and a fine selection of deli meats, cheeses, and spreads to offer Build-Your-Own Hot Paninis! The result: success and content on the part of my husband and our dinner guests. In the end, I felt satisfied with the push to go beyond the bowl of steamy delicious soup. Oh--and, dessert? Monkey bread! But, since I don't bake (much) it was a pre-packaged dessert from the market.

Broccoli Cheese Soup:
1 large section from a shallot, diced finely
4 white ends from 4 green onions, diced (save the green tops!)
1/3 c. butter (it's better than margarine)
1 14 oz. bag of frozen broccoli florets
1 8 oz. block of medium cheddar cheese
1 lb. block of Velveeta cheese
1 32 oz. box of chicken stock
1 1/3 cup 2% milk (less fat makes the soup too runny, more fat makes it more delicious!)
1 tsp. garlic powder
3 heaping tsp. corn starch
1/4 c. water

In a large stock pot, melt butter. Add in shallot and white ends from green onions. Saute until tender. Add in broccoli. Stir and saute a few minutes to defrost broccoli. Pour entire box of chicken stock. Simmer for about 10-15 minutes until broccoli is tender. Meanwhile, shred the cheddar cheese and cut the Velveeta into cubes. Once broccoli is tender, add in both cheeses. Stir in a figure eight shape until cheese melts. Turn heat to medium-low. Add in milk and garlic powder. Allow to heat through entirely. In a separate measuring cup, mix the cornstarch and water. Once cheesy mixture of deliciousness is heated through, add in the cornstarch mixture. Stir constantly until soup is thickened. Serve with a sprinkling of green onion tops. You could even top with bacon bits and sour cream?! Get creative....salsa? More cheese?

Paninis
deli meats--your choice!
deli cheeses--your choice!
bread: the best choices are Sheepherder's and French
spreads like mayo, mustards of various flavors, and cream cheese
sandwich toppers like sliced tomato, lettuce, banana pepper rings, roasted red peppers, chopped olives, pickles, sprouts, or whatever else you like!

Butter the bread and put on a hot panini press. Add your sandwich fillings and toppings, put the other piece of bread on top and press the panini press down. Enjoy alongside the bowl of creamy, delicious, Broccoli Cheese soup!

Here are pictures of the soup...the paninis? Yeah...they were eaten too quickly!


Blueberry Streusel Coffee Cake

I think one of the most perfect unions is that which exists between butter, flour, sugar, and cinnamon. In other words, streusel. I love anything with this crumbly, delicious, topping of perfection, so I take any and all opportunities to flex my streusel muscles when the chance arises. My husband and I are members of Pomona First Baptist Church and a young-married couple's Bible study. Each Sunday two couples sign up to bring snacks, and in an effort to impress my fellow students of the B-I-B-L-E, I made this fantastic breakfast treat. The result: a moist and delicious cake laden with blueberries topped with the perfect streusel...and I returned home from Bible study with an empty baking dish. Success!

Blueberry Streusel Coffee Cake:

4 cups flour
1 1/2 cups sugar
4 tsp. baking powder
1/2 tsp. salt
2 eggs, beaten
1 cup milk
1 cup butter, softened
2 cups frozen blueberries
2 cups chopped pecans

Streusel:
1 cup sugar
2/3 cups flour
1/2 cup cold butter
1 tsp. cinnamon

Combine flour, sugar, baking powder, and salt. Add egg, milk, and butter. Beat well. Fold in berries and pecans. Spread into a greased 9x13 glass baking dish. In a separate bowl, combine dry streusel ingredients; cut in butter until crumbly. Sprinkle over batter. Bake at 375 degress for 45-60 minutes, or until a toothpick inserted into the center comes out clean. Delicious when hot with a pat of butter on top to melt through cake (although my picture clearly was shot before the butter had a chance to melt completely!).

Note: This recipe can be cut in half and baked in a 9-inch baking dish, the cooking time would be reduced to 30-40 minutes.

LinkWithin

Related Posts with Thumbnails